Rebar > Other Type
Overview of Functions
Create rebar in 3D geometry that cannot be defined with Draw rebar or Array rebar functions. You can now create Spiral rebar. You can create longitudinal rebar together.
The modeling process for the 3D shape rebar is as follows:
Step 01. Defines profile information of 3D Shape Rebar. (If necessary, also define the longitudinal rebar profile information.)
Step 02. Selecting the target object creates a 3D shape rebar.
Details of Functions
Create Tab
Type

Select the 3D shape rebar type.
CIM at present only offers Spiral rebar types.
Spiral rebar : Creates a spiral rebar in a cylindrical member.
Select target member

Select an object to place the rebar.
Spiral rebar can only be created in cylindrical members.
Create Longitudinal rebar

Select whether to create longitudinal rebar in the form of 3D shape rebar.
Property Tab > 1st sub tab
Select Spiral / Longitudinal rebar property

For each rebar, select and set the properties of the Spiral rebar and Longitudinal rebar.
Classification
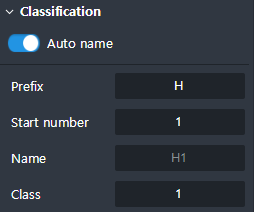
Classify the rebars and define their names.
Auto name : Automatically makes the name of the rebar. Each time you Draw a new rebar, the name is automatically inputted according to the set rules.
Prefix : If Auto name is activated, the prefix is added in front of the number; the numbers are the result of Numberings applied to rebars.
Start number : Specify the number value of the first rebar, when Numbering the rebars.
Name : Displays the name of the rebars that is currently being inputted. If Auto is unchecked, the user can input the desired name.
Class : This is used to classify rebars.
Specification
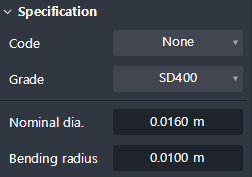
This defines the specification information of the rebar.
Code : Select the criteria for rebar specification. (The Use of DB of Spec)
Grade : Select the grade of steel based on the selected criteria.
Diameter : Select the diameter of the rebar based on the selected criteria. It is activated only when the Code is selected. If Code is on None, setting is impossible.
Norminal diameter : You can check the actual input value of the selected diameter of the rebar.
Bending radius : Automatically reflects the radius value based on the selected criteria and diameter. You can input it by yourself.
Hook
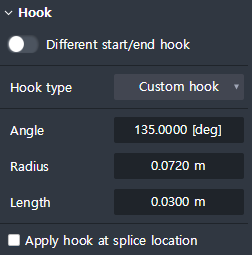
Set the Hook of rebar.
Different start/end hook : If activated, the Hook of the start side and the end side can be inputted differently. When activated, the Start point / End point tab are the buttons that are activated.
Hook type : Determines hook type according to its angles.
- No hook : Does not make hooks.
- ±180° : Creates a hook to be a 180 ° hook.
- ±135° : Creates a hook to be a 135° hook.
- ±90° : Creates a hook to be a 90° hook.
- Custom hook : Create hook with user defined Angle, Radius, and Length information.Angle : You can check the angle value of the hook. (In the case of Custom hook setting, the hook angle can be set.)
Radius : You can check the Bending radius value of the Hook. (In the case of Custom hook setting, the Bending Radius of the Hook can be set.)
Length : You can check the length value (except for the Bending Radius) of the Hook. (In the case of Custom hook setting, the length of the Hook can be set.)
Apply hook at splice location : If you enable this option, a Hook is created at each Rebar splice point. (Displayed when selecting Spiral rebar property
Cover thickness
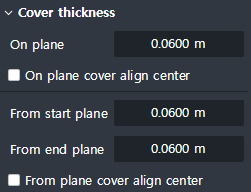
Displayed when selecting Spiral rebar property
Sets Cover information from members.
On plane : Enter the Cover value on the plane.
On plane cover align center : When activated, the On plane input value is the Cover value deriving from the center of the rebar.

From start plane : Enter the Cover value that is farther from the start plane towards the rebar direction.
From end plane : Enter the Cover value farther from the end plane towards the rebar direction.
From plane cover align center : When activated, the From start / end plane input value is the cover value from the center of the rebar.
Offset
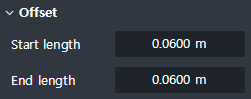
Displayed when the Longitudinal rebar property is selected
Start length : Input the extension length of the starting part of the rebar. If it is a (+) value, it is shortened. and If it is a (-) value, it is lengthened.
End length : Enter the extension length of the rebar’s end point. If it is a positive value, it is shortened. It will lengthen if it is a negative value.

Property Tab > 2nd sub tab
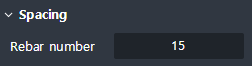
spacing
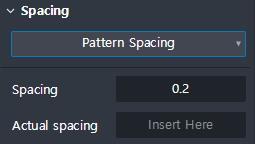
When selecting the Spiral rebar property: Sets the spiral spacing of the Spiral Rebar.
When selecting Longitudinal rebar property: Sets the number of Longitudinal Rebar.
When selecting Spiral rebar property
Number & Spacing : Input as many times as the user wants in the form of spacing. It will no longer be drawn after the user has inputted Spacing information.
Pattern spacing : Repeats the interval specified by the user. Draws up to the End plane according to the Spacing information inputted by the user.
When selecting Longitudinal rebar property
Number of rebar : Input the number you want. It is placed with equal spaces.
Splice
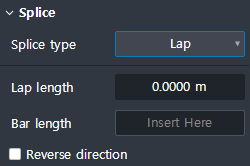
Sets the folds of rebars.
When selecting Spiral rebar property
Splice type : Select the type of lap joints. (Lap, Coupler, Welding)
Lap length : Input the length of the Lap. (Apply when selecting Lap type. Coupler, Welding does not apply.)
Bar length : Input the spacing of the lap joints. Lap joints are placed repeatedly according to values inputted.
Reverse direction : When activated, reverse the direction of deploying rebar’s lap joints.
When selecting Longitudinal rebar property
Number of rebar : Input the number you want. It is placed with equal spaces.
Splice type : Select the type of lap joints (Lap, Coupler, Welding)
Lap length : Input the length of the Lap. (Apply when selecting Lap type. Coupler, Welding does not apply.)
Bar length : Input the spacing of the lap joints. Lap joints are placed repeatedly according to values inputted.
Reverse direction : When activated, reverse the direction of deploying rebar’s lap joints.
Variable rebar name
Sets the name of each rebar in the rebar group.
Array group : Specifies a name for each rebar in the array. (Displayed when Longitudinal rebar property is selected)
-1, -2, -3, ……
-A, -B, -C, ……
-a -b, -c, ……Splice group : Specify a name for each rebar after setting the lap joints.