Draw (Stiffener Draw)
Overview of Functions
Draw a stiffener.
Details of Functions
Draw Tab > Transverse Stiffener
Draw transverse stiffener
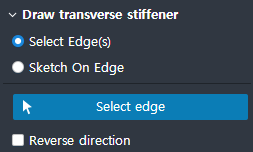
The ability to model transverse tendons.
There are two ways to model.
Select Edge(s) : Creates a stiffener by selecting an edge on the screen.
- Reverse direction : If checked, the stiffener is created in the reverse direction based on the edge.Sketch On Edge : Creates a stiffener by entering two points directly along the edge.
- Reverse direction : If checked, the stiffener is created in the reverse direction based on the edge.Reverse direction : Stiffeners are created in the opposite direction of the selected edge.
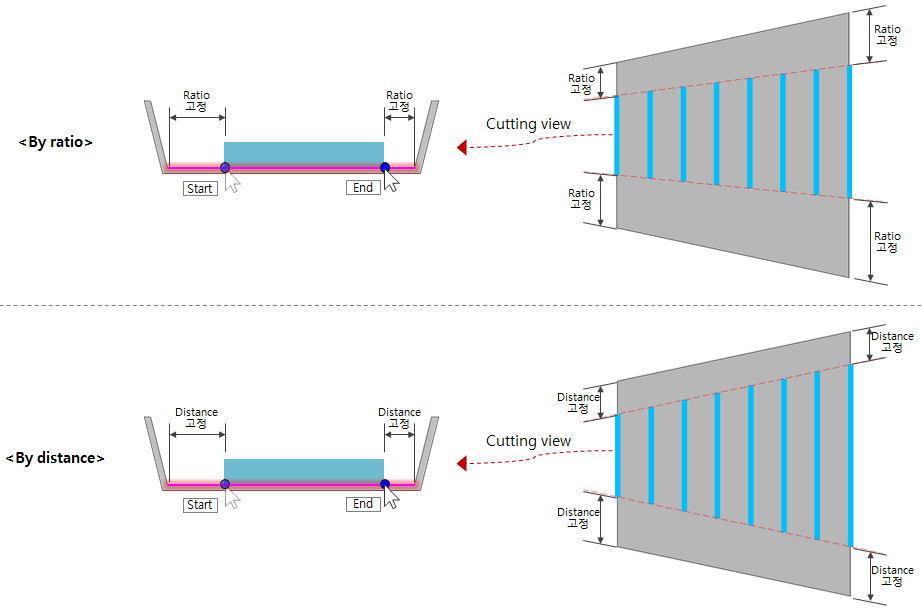
Alignment of points
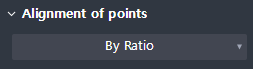
Displayed when Sketch On Edge is selected
When the stiffeners are arrayed, the pick point determines the options along the edge direction.
By ratio : In Tapered array, pick point 1 and 2 are arranged to find the ratio point of the edge. (Default)
By distance : In Tapered array, Pick point 1 and 2 are arranged to find a certain distance point from the near edge on the edge.
Draw Tab > Longitudinal Stiffener
Draw longitudinal stiffener
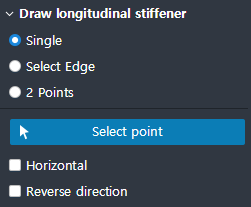
The ability to model longitudinal tendons.
There are three ways to model.
Single : Click on a point on the edge of the target member that exists on the plane to create a longitudinal stiffener.
Select Edge : Select the edge of the target member that exists on the plane to create a longitudinal stiffener.
2 Points : Click two points within the edge of the target member that exist on the plane to create a longitudinal stiffener.
Reverse : The stiffener is created in the opposite direction.
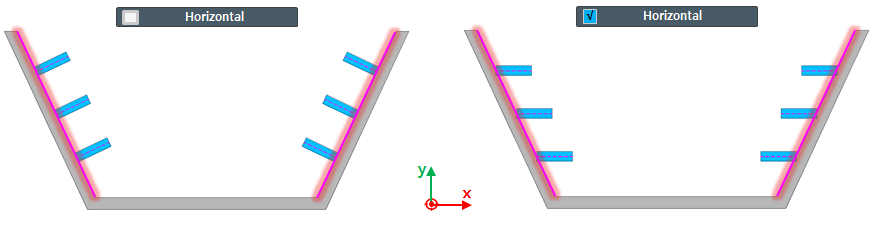
Horizontal : Create stiffeners parallel to the X axis.
Reverse start point : This option changes the time / end point to which the property value is applied. (Expressed in Select Edge)

Property Tab > 1st sub tab
Classification
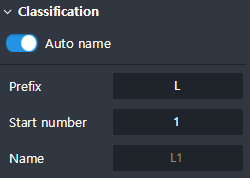
Define the classification properties for the longitudinal and lateral stiffeners.
Auto name : If it is checked on, the Stiffener automatically defines its properties.
Transverse Stiffener
- Prefix : T / Start number : 1 / Class : 1
Longitudinal Stiffener
- Prefix : L / Start number : 1 / Class : 1Name : Input the name of a stiffener.
Property Tab > 2nd sub tab
Section
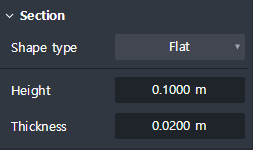
Select the type of stiffener.
Flat : Thickness, Height
Angle : Height, Breadth, Web thickness, Flange thickness
T-section : Height, Breadth, Web thickness, Flange thickness
I-section : Height, Breadth1 ∙ 2, Web thickness, Flange thickness1 ∙ 2, Rounding radius 1 ∙ 2
U-section : Height, Breadth1, Breadth2, Thickness, Rounding radius
End shape
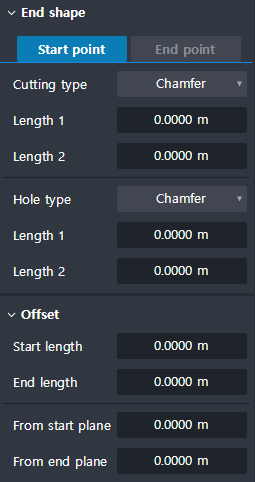
This setting is for the shape of the stiffener at the start/end point.
Displayed when the flat section is selected.
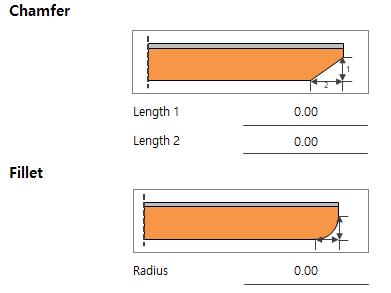
Cutting type : Chamfer / Fillet can be applied to the start/end point.
Displayed when the Flat / Angle / T section are selected.
Hole type : Chamfer / Scallop can be applied to the start/end point.
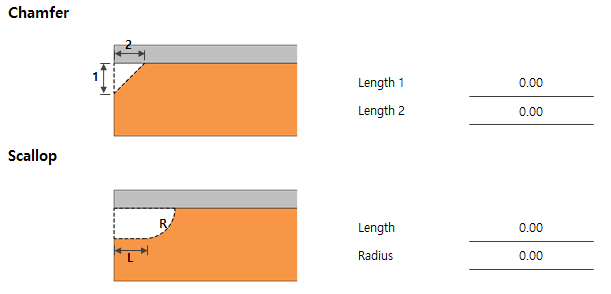
Displayed when the flat section is selected.
Offset : Offset can be applied to the start and end points respectively.
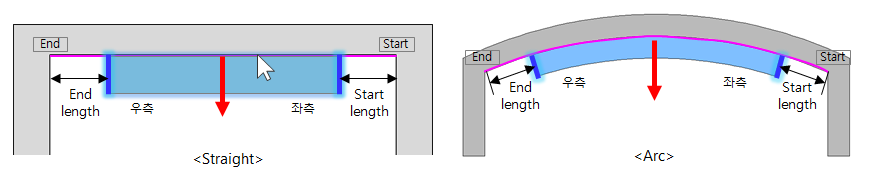
- Start length : When drawing a stiffener, it is drawn offset from the start length by the input value.
- End length : When you draw a stiffener, it is drawn offset from the point by the end length input.
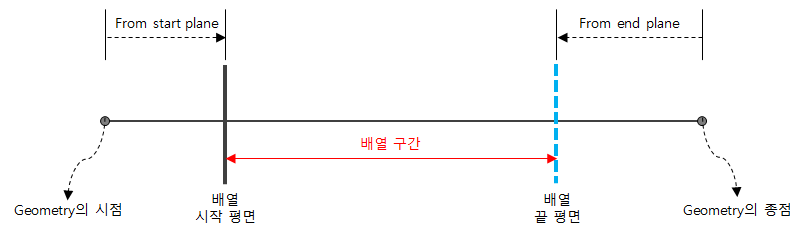
- From start plane : The offset is generated by the input value from the plane generating the stiffener.
- From end plane : It is created offset by input value from Plane defined in Array.
Property Tab > 3rd sub tab
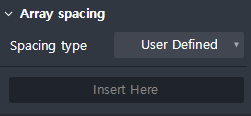
Array spacing
Sets the spacing for longitudinal stiffeners.
Spacing options include Adjustable spacing, By number, Limit Max. Spacing, Pattern spacing and User defined are provided.
Spacing type : Select the Spacing type.
Adjustable Spacing : After arranging by the interval value you aim, the stiffener is moved to the remaining intervals. Optionally adjust the stiffener spacing between the start, end, and midpoint.
- Adjust at
① First spacing : After arranging the Base Spacing values, adjust the remaining values in the first stiffener interval.
② Last spacing : After arranging the Base Spacing values, adjust the remaining values from the last stiffener interval.
③ First/Last spacing : After arranging by Base Spacing value, adjust the remaining value by dividing the remaining value by the first and last stiffener spacing.
④ Middle spacing : After arranging the Base Spacing values, adjust the remaining values at the middle stiffener spacing (closer to the point if odd).
- Base spacing : Set the target interval value. Arrange the values by their values along the Array path.by Number : Arranges the number entered equally, regardless of the spacing.
- Number of rebar : Enter the number of stiffeners you want to arrange.Limit Max.spacing : Arrange at intervals not exceeding the value entered.
- Max. spacing : Enter the maximum value for the interval. Arrange the stiffeners without allowing a gap greater than the entered interval.Pattern spacing : Arranges only as much as you enter, but no additional arrays.
- Spacing : The interval value entered here is arranged and the interval smaller than the interval is not arranged.User defined : Type in the interval you want.
- Spacing : Enter the user-defined interval. (ex. 3@200, 400, 5@150)